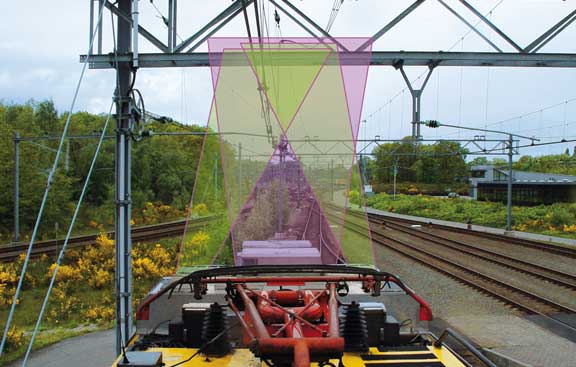
WireCheck is an automatic measuring system that determines the thickness of the contact wire respectively the remaining height of one or several parallel contact wires at high speed. In view of the increasingly high line occupancy, the user has to be provided with a high-quality, safe and objective status of the inspected line in the shortest time using the latest technology. WireCheck ensures a fast, safe and reliable contact line inspection by means of innovative sensor systems and the most up-to-date image processing technologies.
Description
The WireCheck system measures the height and position of up to four contact wires relative to the carriage body and determines the remaining height of the active contact wire contactless at speeds of up to 200km/h. The position of the overhead line is detected by the subsidiary system WireCheck LinePosition. The WireCheck system determines the remaining height of the contact wire by the use of the triangulation method. A frame camera points at a section plane generated by a line laser. If there is an object on this plane, the object‘s contour is detected by the camera and converted into metric coordinates. The rolling and lateral movement data measured by the CarBodyCompensation System is used together with the height data when calculating the position of the contact wire. The measurement results are stored in a list and linked with the corresponding location data. The system‘s measuring accuracy is ≤ 0.2 mm.
Evaluation/Documentation
The evaluation system saves the measured data on the contact wire position, the rolling movement, the calculation of the remaining height and optionally the track gauge, rail wear and other derived data. The contact wire position is shown online as a height and position diagram during the inspection run. The chainage ensures a correlation between the track data and the measured data to within one metre of accuracy. The positions of the faulty sections of contact wire are saved in the error log based on the chainage. The Central Data Acquisition Unit controls the overall system and visualises the data. This configuration means that the current system can be extended to include additional modules with recording systems or other sensors such as the visual inspection system RailCheck.
Résumé
The system is characterised by the following features:
- High measuring speed of up to 200 km/h
- High measuring accuracy of ≤ 0.2mm
- Easy operation; intuitively controllable user interface
- Modular concept
- Low maintenance requirements
- Easy integration thanks to small space requirements both on and in the vehicle
- Open system; thereby easy adaptation to specific national database systems or central data acquisition on the vehicles


 WireCheck